Solving text based CAPTCHA with Machine Learning — part 2
How toContinue our journey on dealing with an out-dated authorise system, which is text based CAPTCHA.
If you missed the first part, it can be found here*
What we know so far
- We learned that CAPTCHA backfires user experience more than bots when it becomes too complicated.
- We learned about concept of CNN
- Using EMNIST instead of MNIST for out training dataset
Today we are going to try to write our model from scratch. First, let’s download our training set.
You’ll notice that it doesn’t contain just one single .csv file, but multiple of them separated in training, validation, test, and multiple data organisations!
If you’re really interested in the dataset, here’s the paper. (recommended)

The dataset is neatly organised. It is separate by Class and Merge. As what author described, By_Class is the original 62 classes (upper case, lower case letters, and number). However, if we take a look closely, we realise that there exists huge overlapping across the set.
E.g. 0 and o and O
If we want to be extremely precise such that we want the model to differentiate between X and x, we can go with 62 classes yet, we can expect a poorer performance comparing to 47 classes.

To avoid this overlapping problem, we are going to use By_Merge
Now that we have chosen our training data sets. We will move on to implementation, where we write our model using python.
Tools
- Sklearn, just to split between training and validation set
- Keras
- Pandas solely to read csv file

After we read csv file using pandas, we will have to split between training set and validation set. In this case, we are going to use 80% training and 20% validation. This process is purely reading data.

We then need to change the y (our label) to category, we have a total of 47 categories. Hence, num_classes will be 47.

If we print out number of samples, we can see that we only have 90239 train samples and 22560 validation samples (using partition of 80/20). To compensate with this small data sets, we can use ImageDataGenerator which we can import from Keras (keras.preprocessing.image) to create noise, and variation of our data.

Example of picture create by ImageDataGenerator (from Keras blog)
Our data is now prepared to be train, it’s time to move on to writing our own model.
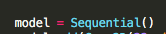
We are going to create stack of layers for our Convolutional Neural Network. We will need to start by defining.
Follow by adding stacks of layer, it is as simple as calling.

Starting with 32 dimensions of filter, kernel size of 5x5. Unfortunately the EMNIST picture is relatively small, if we were to expand the dimension further it might lead us to overfitting.
After two laters, we will do pooling which will extract only the important feature across each of the 2x2 grid (hopefully!). Then follow by Batch Normalisation, and again, to prevent overfitting, we will have to drop some of the nodes, setting Dropout to 0.25.

Adding couple more stack of layers. In the end, we will flatten out everything into a fully connected network. Our last layer will be the layer that have the same number of nodes with number of classes. That’s why it is Dense(num_classes)
Before we can do anything further, we must compile our model. I use crossentropy as a the loss function, our optimiser which is Adam. Lastly, to evaluate the performance, we will need a metric function.
After that, we will also need a callback. I simply use ReduceLROnPlateau which reduce the learning rate when the metric has stopped moving.
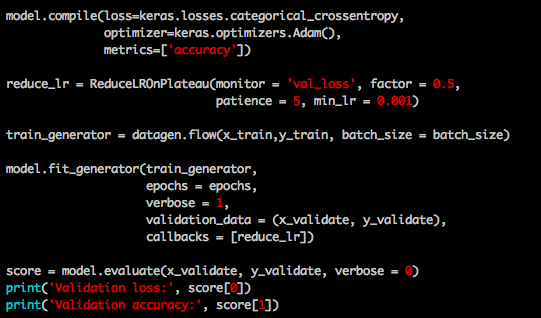
I use most of the default value in Keras documentation, if you want to play around with the model. I suggest you read up the documentation and see what can be done with each of the parameters
Within the first 10 epochs, we got an accuracy of. ..

85% accuracy in validation, not bad! Let’s see how far we can go. If you’re running this on your CPU which I don’t recommend, it will take quite sometime.
and at epoch 500 ..

Sweet! Unfortunately it seems like with this setting, we cannot break the cap of 88% accuracy, but that’s good enough! It’s time to test it out with our test set, shall we?
Using our save model, we can simply do the following. Read the test data, load our model, and evaluate.

And the accuracy with the test set is ….

Now we can partition our CAPTCHA picture depending on how many characters it has and have our model predict it. To be fair, since CAPTCHA comes in various length of characters (from 4 up to 8), we will have to preprocess this part ourselves. A little cut and trim before passing the picture in wouldn’t hurt. The model and parameters can still be improve for certain, because as I write this sentence, the model have an accuracy of 90% ;) .It is up to each individual how to optimize this further!
Contact us
Drop us a line and we will get back to you

